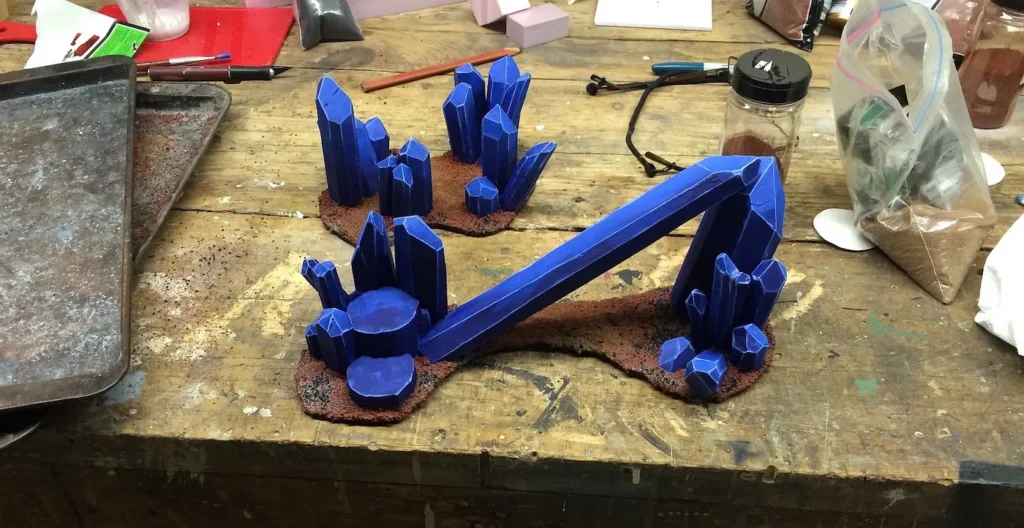
Many of you had comments and questions about the giant crystal forest that appeared as sci fi terrain in some of my recent Beyond the Gates of Antares pictures. I’ve been wanting to blog again, and seemed an ideal subject.
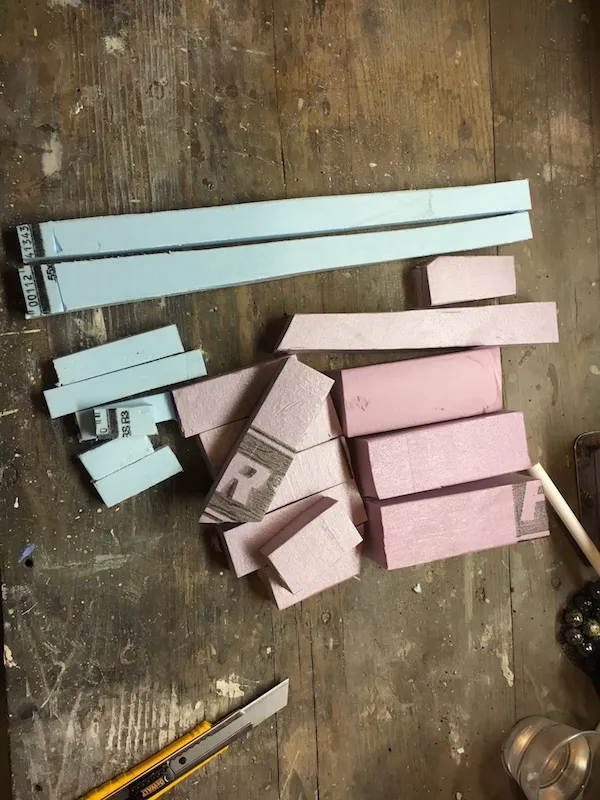
Building the crystals is straightforward, and a good use for any scrap foam you have.
Rules
First, let’s take a quick look at how to use these crystals in a game of Beyond the Gates of Antares. If you have suggestions for other rule sets, post them in the comments below.
Crystal Forest
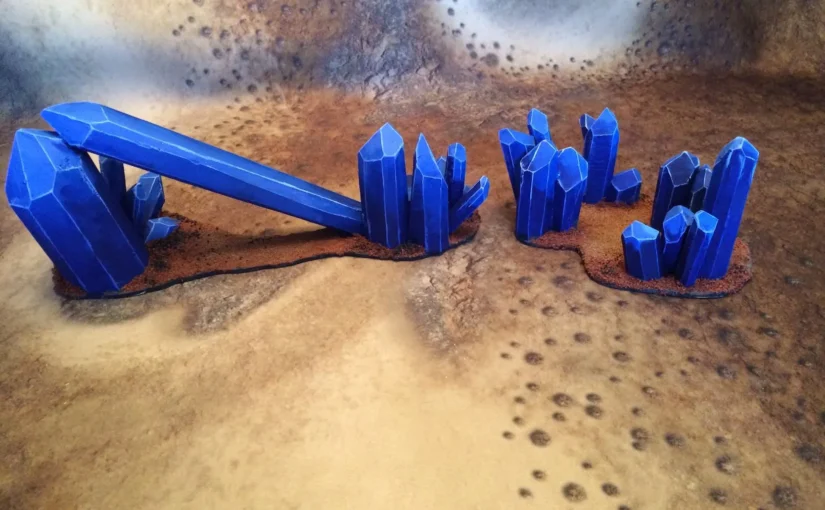
Giant crystals, or clusters of them, grow out of the ground like trees. The ground between them has filled in, allowing easy passage for troops.
LOS: Dense Terrain COVER: Res+2 DIFFICULT: NO/Impassible to large models
I treat the area under my crystal bridge as open, and passable to anything that fits under it.
Tools
- Box Cutter — You want the kind with the blade you can snap pieces off of to keep it sharp. This type of box cutter can extend the blade a few inches so you can cut through thick foam.
- Coping saw, scroll saw, or band saw — You only need this if you want to cut out base shapes
- Paint brushes — I have collected a set of crappy brushes I use for painting terrain
Materials
- Scraps of pink and blue foam in different thicknesses. I used 3/4”, 1” and 2”.
- Pre-cut bases or thin board to cut your own — I use 1/8” (3mm) hardboard, though I plan to try foamed PVC next time I buy base materials.
- Aleene’s Tacky Glue and/or medium viscosity super glue
- Stiff wire or long pins with tiny heads
- Craft Acrylic Paint — White and appropriate “gem” colors
- Whatever you use for finishing the bases of your terrain
Cutting Crystals
Don’t measure. Like many of the scenery projects, you don’t want things to be perfectly straight and even. Otherwise, it won’t look natural. Take your time eyeballing measurements, though. Things shouldn’t be too far off.
Here are the basic steps to cutting the crystal shapes.
- Cut strips of foam so they are roughly as wide as the foam is thick. That is, if you are cutting 1” foam, you want to end up with strips that are approximately 1” x 1”. At this point the length of the strips doesn’t matter.
- Now you want to cut your strips to lengths slightly longer than you want them — later steps will make them shorter. Make sure you cut a variety of lengths in all different thicknesses. You don’t want your 2” crystals to all be longer than your 3/4” crystals.
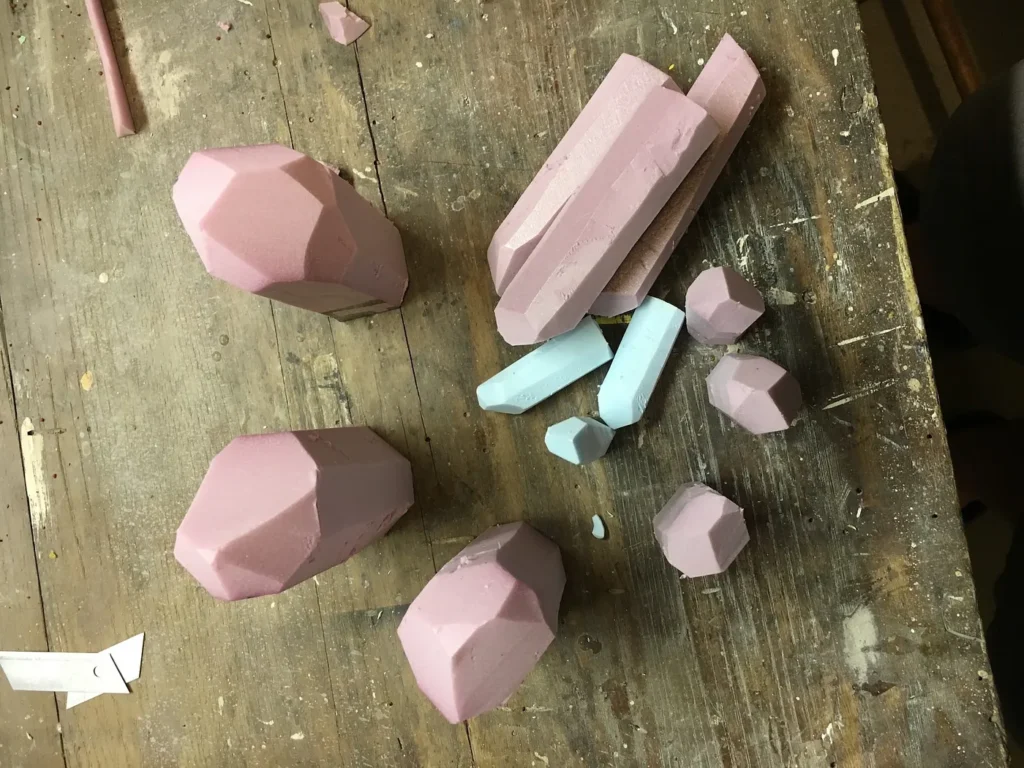
- Stand your foam strips on end and cut the corners off to make them octagonal. Don’t worry about precision geometry, you just want them to be octagonal-ish. Use a fresh, sharp blade here to help prevent tearing little pieces out of your foam.
- Finally, you need to cut the tops. Don’t sharpen them with lots of little cuts like you are whittling a marshmallow stick. Also, don’t try to make the facets from the body of your crystal come together at a perfect point. Look at pictures of real crystals and you notice that there are often 2 or 3 larger facets, and a number of smaller ones connecting them. The tips are never flat, but they are often edges and they are rarely centered over the body of the crystal.
Bases
you are aiming to make crystal forest scatter terrain, keep in mind that the crystal clusters will be wider than tree trunks. You will need to make bigger bases than you think. Be sure uo can move troops between the crystals. I have a pile of laser cut plywood bases that somebody gave me I try to use. If I can’t find the shape I want, I’ll cut it out on my scroll saw.
You could also base individual crystals, or crystal clusters, to use as obstacles. Again, just make sure your bases are large enough for the crystals you are intending to mount on them.
Mounting the Crystals
Mounting the crystals on the base is straight forward. I used Aleene’s tacky glue for most of the crystals. A few of the them didn’t want to stay where I put them with the tacky glue, so I used super glue for those. I also used wire to pin troublesome crystals to their more stable neighbors.
- Looking at your base, decide where you want your clusters of crystals to be. Select one of your larger crystals to be an anchor for this cluster. You can cut the bottom so that the crystal stands at a slight angle. Don’t put too much of an angle on it. These anchor crystals should stand straight for greatest stability.
- While you wait for the glue to set, cut bottoms of the remaining crystals. You want some to be nearly straight up and down. Others should be at more interesting angles.
- Glue your more vertical foam crystals around the anchor crystals. Line up the flat faces next to each other, but make positioning around the anchor crystal somewhat random. You don’t want them spread evenly around the anchor. The anchor doesn’t even have to be completely surrounded.
- Finally, attach your remaining crystals around the outside of the cluster. As always, avoid patterns. The crystals won’t all be pointing straight out. Some could cross over each other. You might have difficulty getting a few of these crystals to stay in place while they dry. Use pins and superglue it will work out.
Painting the Crystals
There are lots of tutorials out there for painting miniature gems. I took a simpler approach when painting my crystals, but if you want to take the time, you can get amazing results with these techniques.
You can use cheap, craft acrylic paint for most terrain projects. I bought a ton of it cheap a few years ago when a local craft store when out of business. You only need a couple colors for this project, white, and a rich gem color. I think the color I used was actually called sapphire blue.
- Put a healthy dollop of your gem color and another, smaller, dollop of white on a piece of palette paper, or parchment paper. Make sure they are separated by a couple of inches.
- Using your brush, pull some of the paint from each color towards the other and mix a little where they meet in the middle. You should have a range of colors between your dark gem color and white. You want quite a bit of your dark color to remain and just a little of the pure white.
- I found it easier to paint one crystal at a time. Starts by painting the bottom your dark color and carry that up 2/3 to 3/4 of the way to the top of the crystal.
- Take a lighter shade and paint down from the top. The higher the top is, the lighter you want it.
- As you get near the dark color, you can use the intermediary shades, and a little water to wet blend the transition between the colors. Longer crystals want a more gradual transition. Don’t sweat this too much. Just avoid having a sharp line between your light and dark shades.
- When the body color of the crystal is dry you want to highlight the edges with a side brushing technique. Load your brush with paint and gently slide the side of the brush up the edges of the crystals. Use the lighter color near the bottom of the crystal, and your white on the top.
Finishing the Bases
The final step is to finish the bases around and between the crystal clusters. Use whatever techniques you want to make the crystals fit into the rest of your scenery. I’ll cover the Mars basing techniques I use in a later article. You could also use more regular rocks, desert, or jungle vegetation. Another idea is to model the crystals coming out of buildings or street terrain as if they exploded out of the ground during a Sci Fi cataclysm.
If you think these giant crystals as neat, you might want to take a look at the Cave of Crystal Giants in Mexico. This natural cavern full of giant selenium crystals was found in a mine. The heat and humidity of the cave make it very difficult to explore. Sounds like a good job for Boromites!
I’d love to see what you all do with these ideas. Please, post pictures to your work in the comments blow along with any ideas you have for improving on my techniques